Hero Banner

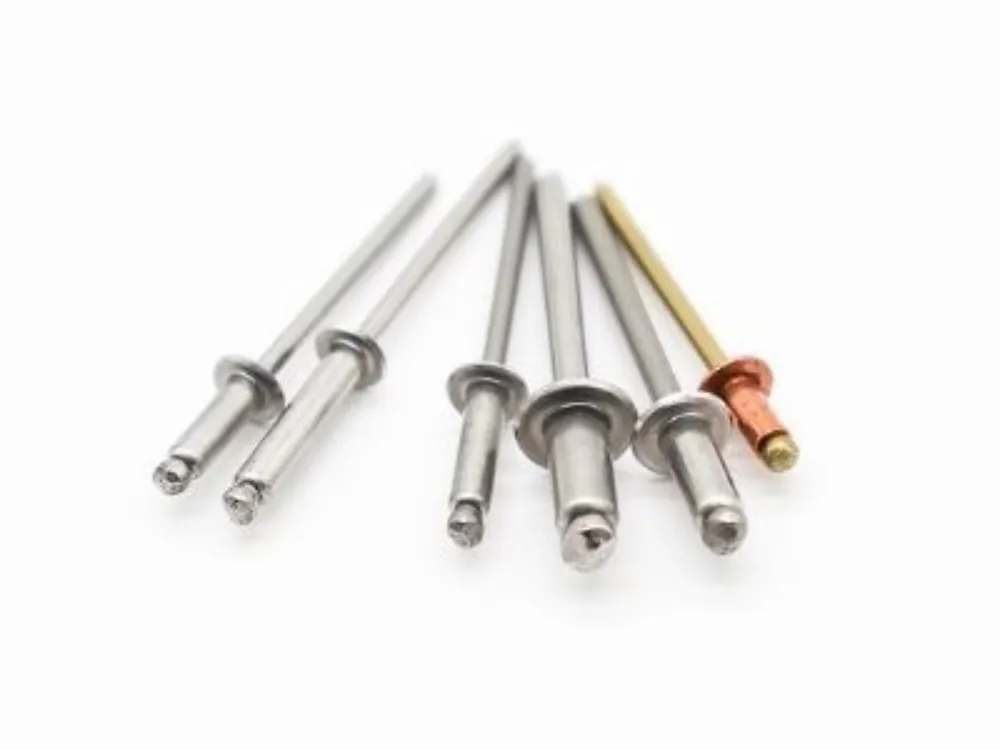
Decoding Blind Rivet Sizes: Your Comprehensive Dimensions Guide

Fasteners

Posted on January 4, 2024

Blind rivets, also known as pop rivets, are crucial tools for professionals and DIY enthusiasts alike. They offer a simple and reliable solution for joining materials in various applications. This guide not only explains how to choose the right rivet, it also offers insights into the correct installation techniques.

Blind rivets, also known as pop rivets, are crucial tools for professionals and DIY enthusiasts alike. They offer a simple and reliable solution for joining materials in various applications. This guide not only explains how to choose the right rivet, it also offers insights into the correct installation techniques.

Simplified Guide to Rivet Materials and Size Codes

Selecting the right rivet involves understanding both the material and the size codes. Each code, such as ABL6-8A, is a shorthand for the rivet's specifications:

Material (First Letter)

The code begins with a letter that specifies the rivet material—'A' for Aluminum, a lightweight and versatile choice, or 'S' for Stainless steel, known for its strength and corrosion resistance. The material should match your project's needs for durability and environmental conditions.

Head Style (Second Letter)

The second letter, like 'B' for button head, identifies the head style. This choice depends on the desired balance between aesthetics and functionality.

Body Diameter and Grip Length (Numbers)

The following numbers give the rivet’s body diameter and maximum grip length, respectively. These dimensions are crucial for ensuring the rivet fits the pre-drilled hole and can effectively clamp the materials together.

Mandrel Material (Final Letter)

The last part of the code often matches the rivet body, and indicates the mandrel's material, which affects the rivet’s overall strength.

This concise understanding of the size code will help you choose a rivet that's suitable in terms of material, size, and strength, to help ensure a robust and lasting joint for your project.

Sample Chart: Decoding Size Code for Blind Rivets

To illustrate how size codes translate into practical specifications, here's a sample chart for common blind rivets:

Key Factors in Rivet Selection: Strength, Grip, and Head Design

Now that we've covered the basics of size codes, let's delve into the key factors that influence the selection of the right rivet: strength, grip range, and head design.

Evaluating Rivet Joint Strength

Having decoded the size codes and materials of blind rivets, the next crucial step is to assess the strength of the joint they will form. The information gleaned from the size codes - particularly concerning the rivet's diameter and grip length - is directly linked to how well the rivet can sustain loads and stresses. These dimensions are not just measurements; they are indicators of the rivet's capacity to create a strong, enduring joint in your project.

Influence of Diameter

The diameter of a rivet directly impacts its ability to bear loads. Larger diameter rivets offer more surface area in contact with the material in order to distribute stress more effectively and to create a stronger bond. Conversely, smaller diameter rivets are suitable for lighter applications where less stress is exerted.

Role of Grip Length

The grip length, indicated by the second number in the size code, determines how well the rivet can handle the thickness of the materials being joined. A correctly chosen grip length ensures that the rivet can effectively clamp the workpieces together to provide sufficient tensile strength. Rivets with a grip length too short may not form a secure bond, while those too long could lead to improper installation and weakened joints.

Understanding how the diameter and grip length affect joint strength is essential for selecting the right rivet. This ensures that the rivet can withstand the intended load and stress to maintain the integrity and longevity of the joint in various applications.

Grip Range and Material Thickness

Understanding Grip Range

The grip range of a rivet refers to the range of material thicknesses that the rivet can securely fasten. Each rivet size is designed with a specific minimum and maximum grip range. Select a rivet whose grip range encompasses the total thickness of the materials you are joining. A rivet with a suitable grip range ensures optimal expansion and a strong joint. An incorrect grip range might result in a weak bond or an over-expanded rivet that can lead to joint failure.

Measuring Material Thickness

Accurately determining the combined thickness of the materials to be joined is crucial. The rivet's grip length should be equal to or slightly greater than the total material thickness. This alignment guarantees that the rivet can create a firm and lasting joint without protruding unnecessarily or failing to engage the materials fully.

This section highlights the importance of carefully matching the rivet's specifications to the physical characteristics of the materials being joined. By doing so, you ensure a secure and durable fastening, which is essential for the integrity and longevity of your project.

Head Shape and Size

The head shape and size of a blind rivet are critical aspects to consider when selecting the right rivet for your project. Three common head styles are the dome head, countersunk head, and large flange head:

  • Dome heads are the most common, and have a low profile and sufficient bearing surface.
  • Countersunk heads, on the other hand, are ideal for applications that require a flush surface.
  • Large flange heads offer an increased bearing surface for softer or brittle materials.

The size of the rivet head should be chosen based on the load it needs to bear and the material it will be applied to. Remember, a larger head provides a wider surface area and can spread load over a larger area, thereby reducing the chance of material pull-through.

Installation Insights

Proper installation is crucial for the effectiveness of blind rivets. Ensure your workpieces are prepared and that you have the correct tools for the job.

Step-by-Step Guide

  1. Prepare the Materials: Begin by ensuring your workpieces are clean, deburred, and aligned correctly. The holes should be pre-drilled and must match the size of the rivet to be used.
  2. Insert the Rivet: Place the rivet in your rivet tool and make sure that the rivet's mandrel is fully engaged with the tool's jaws. Insert the rivet into the hole in your workpieces.
  3. Operate the Rivet Tool: Squeeze the handles of your rivet tool together until the mandrel snaps. This action expands the rivet body, fills the hole and creates a strong, tight bond between the workpieces.
  4. Inspect the Rivet: After installation, inspect the rivet to ensure it is seated properly and that the mandrel has snapped off at the correct point. A correctly installed rivet will be flush with the material and will be secure.

Note: Always refer to manufacturer guidelines when installing blind rivets, as specific instructions can vary based on the type of rivet and tool used.

Explore a Wide Range of Blind Rivet Sizes at FSI

Fastener Systems Inc. (FSI) offers a wide range of blind rivet sizes to meet your project's needs. With different diameters and grip lengths available, our selection ensures effective fastening across various material thicknesses. Our goal is to help you choose the right blind rivet for your work. 

Contact us today for more information on our entire line of fasteners and other products.